You can easily get started extracting meaningful metadata from your media files by using the Media Analysis Solution on AWS.
The Media Analysis Solution provides AWS CloudFormation templates that you can use to start extracting meaningful metadata from your media files within minutes. With a web-based user interface, you can easily upload files and see the metadata that is automatically extracted.
This solution uses Amazon Rekognition for facial recognition, Amazon Transcribe to create a transcript, and Amazon Comprehend to run sentiment analysis on the transcript. You can also upload your own images to an Amazon Rekognition collection and train the solution to recognize individuals.
You only pay for the services you use when testing this solution. For 1080p HD video, launching this solution will likely cost less than $8 per hour of footage. This solution is available in various sizes based on the amount of metadata that will be indexed for your media library. Pricing for sizes ranges from $300-$1000 per month, which primarily consists of Amazon Elasticsearch Service compute and storage for indexing, searching, and storing metadata.
In this blog post, we’ll show you step-by step how to launch the solution and upload an image and video. You’ll be able to see firsthand how metadata is seamlessly extracted.
Note:This solution uses Amazon Rekognition, Amazon Comprehend, and Amazon Transcribe, which are currently available in specific AWS Regions only. Therefore, you must launch this solution in an AWS Region where these services are available. For the most current AWS service availability by Region, see AWS service offerings by region.
Step 1: Deploy the Media Analysis Solution
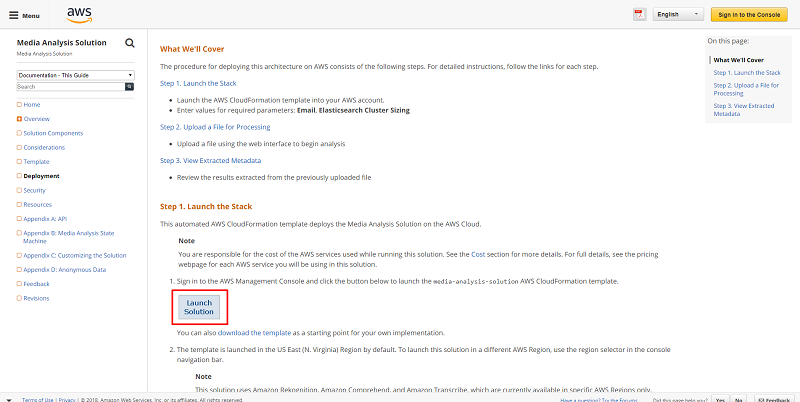
Sign into the AWS Management Console with your user name and password to get started. Then go to the Media Analysis Solution and choose Deploy Solution.
Step 2: Launch the AWS CloudFormation template
Choose Launch Solution under the “Launch the Stack” section in the documentation guide.
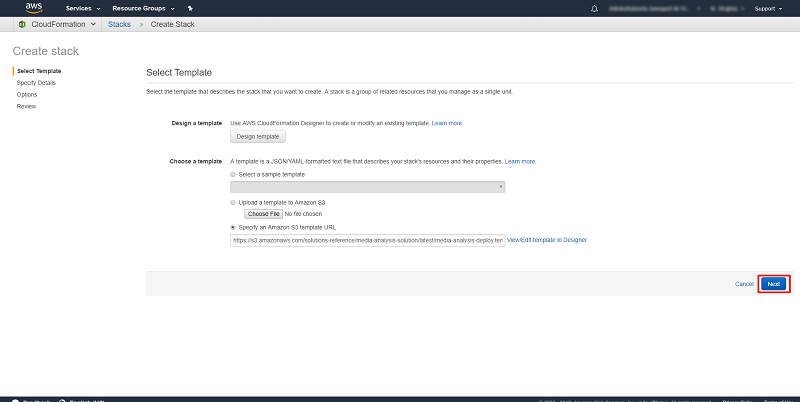
Step 3: On the Select Template page, choose Next
Step 4: On the Specify Details page, enter your email address and choose Next.

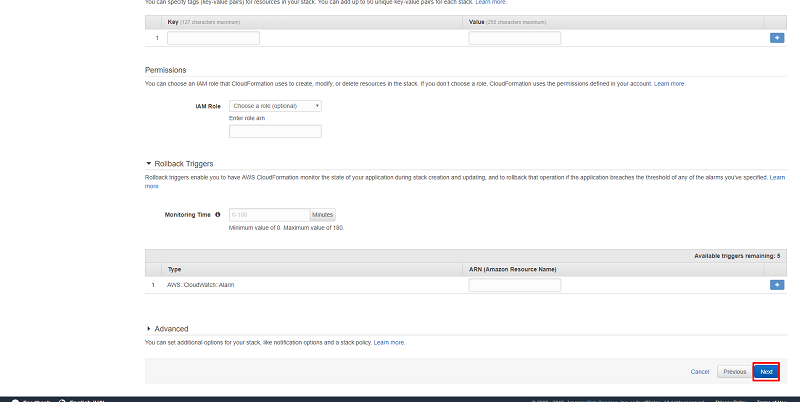
Step 5: On the Options page, choose Next
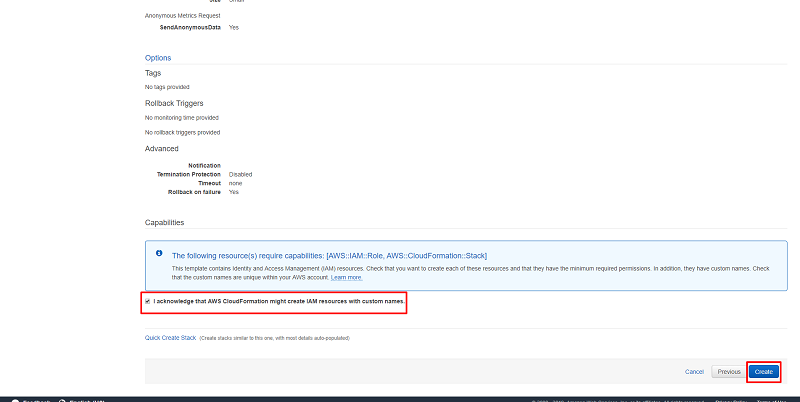
Read the acknowledge agreement at the bottom of the page, check the box: “I acknowledge that AWS CloudFormation might create IAM resources with custom names,” and choose Create.
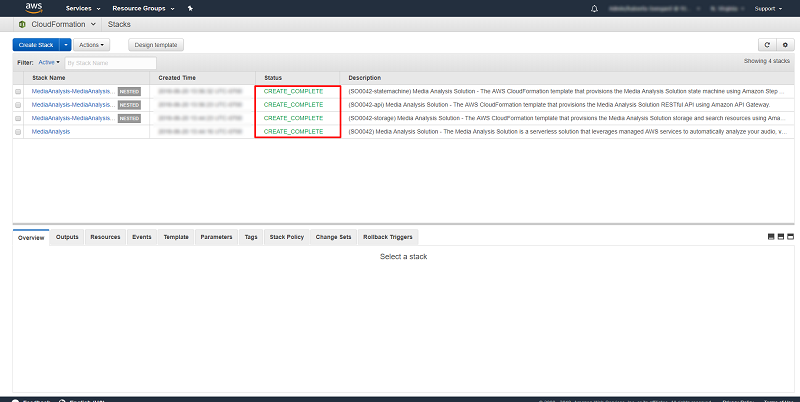
Wait approximately 20 minutes for the stack to be deployed. When you see CREATE_COMPLETE you will receive an email with the URL to log in to the Media Analysis Solution page.
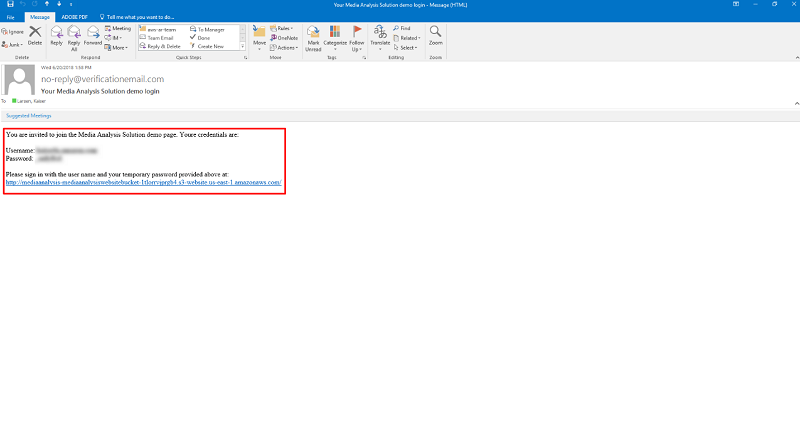
Step 6: Get your user name, temporary password, and sign in URL
If you see CREATE_COMPLETE, then you should have received an email like the one that follows. Note that after you sign in with your temporary password you will be prompted to create a new password (must include at least one capital letter).
Step 7: Sign in with your user name and temporary password to get started
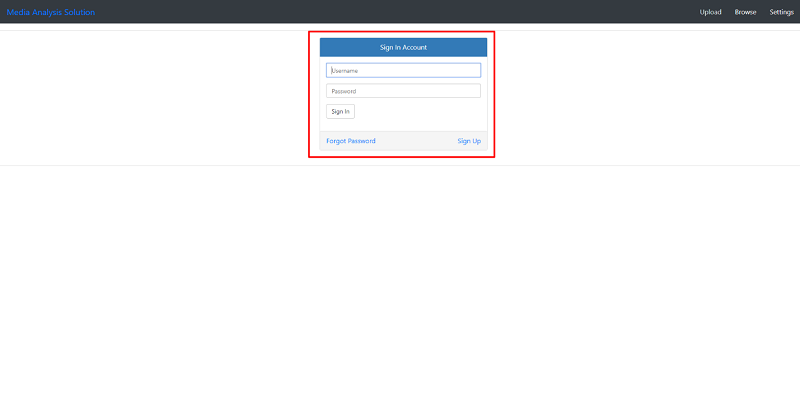
After signing in, click “Upload” in the top right corner.
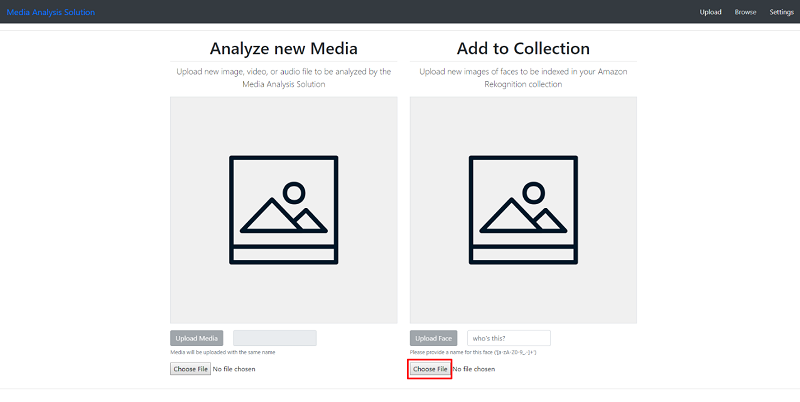
Step 8: Add to Amazon Rekognition collection
In addition to analyzing media, this solution enables you to upload faces to an Amazon Rekognition collection so that they are automatically recognized in any uploaded media. For this tutorial, I will upload an image of Matt Wood (click here to download).
Select Choose File(or Browse for those on a Mac) and select the image you just downloaded.
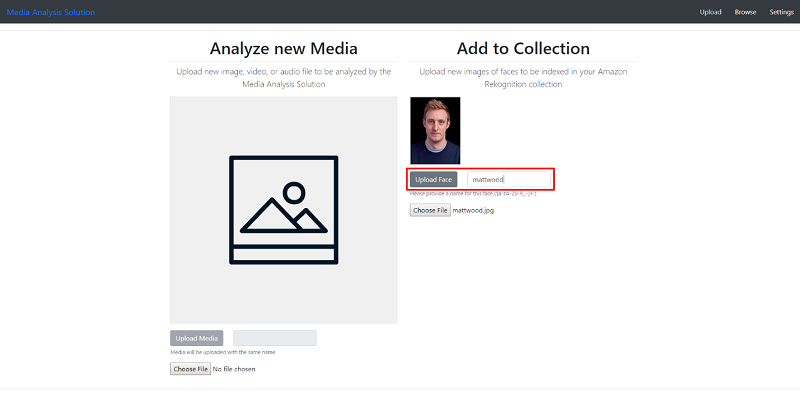
Next, name the image “mattwood” and choose Upload Face.
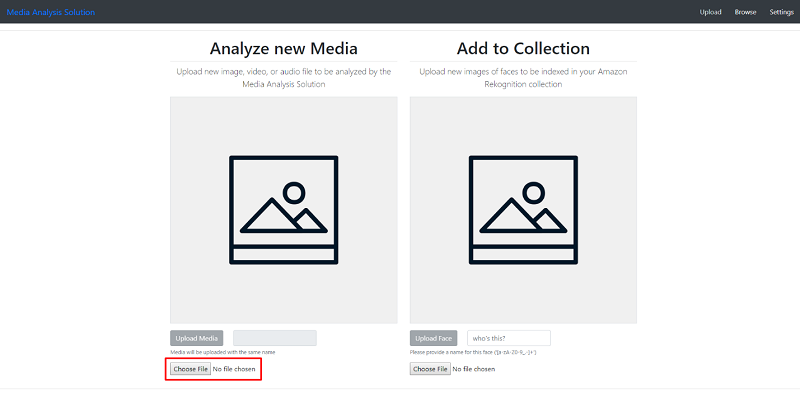
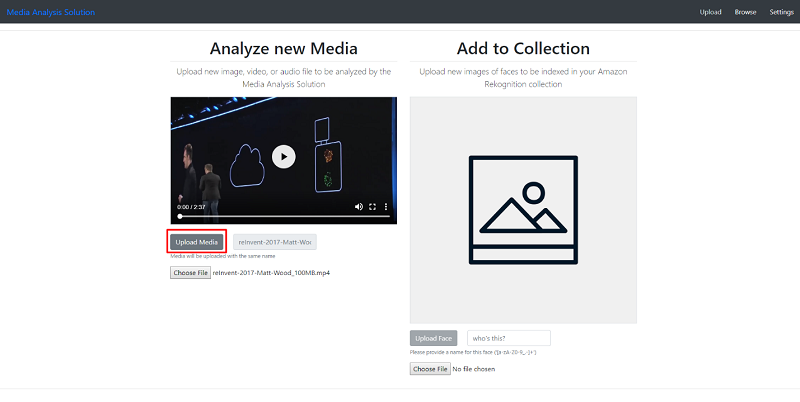
Step 9: Upload new media
Now, we will upload a video file to be analyzed to demonstrate how this solution automatically uses features from Amazon Rekognition, Amazon Transcribe, and Amazon Comprehend. You can upload any file up to 100 MB in the demo console, but for this tutorial we will upload footage from Matt Wood at re:Invent 2017 (click here to download).
Select Choose File (or Browse for those on a Mac) and select the video you just downloaded.
Choose Upload Media.
Note that if you want to upload a file over 100 MB, you will need to do so directly in the media analysis Amazon S3 bucket that was created as part of the AWS CloudFormation template. This 100 MB limit only occurs when using the demo console.
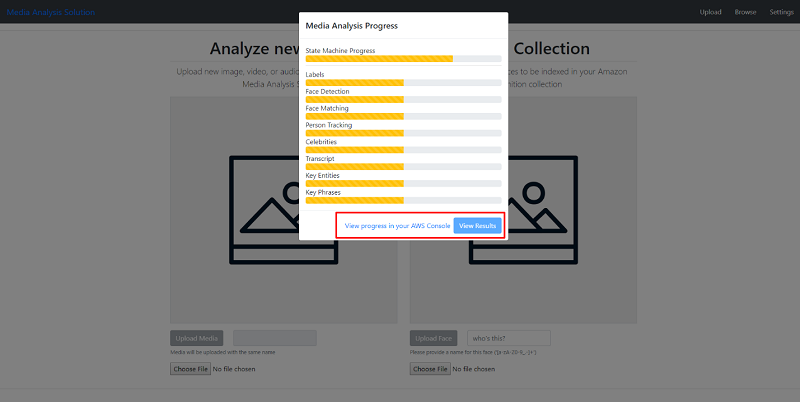
The analysis of the video will begin automatically after the upload is completed. Upload times will vary depending on internet connection. You can view the progress by choosing View progress in your AWS Console, or you can wait until the progress bars have turned green and choose View Results.
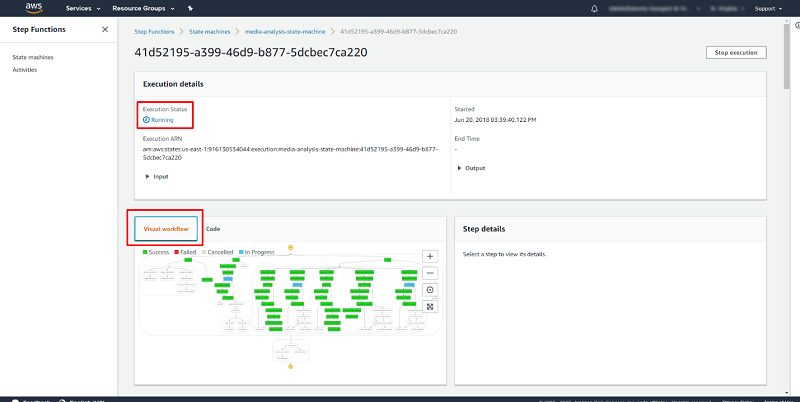
If you chose View progress in your AWS Console, you can see if the solution is still running under Execution details. **You can also see the step functions under **Visual workflow.To go back to the Media Analysis Solution page, use the back button in your browser and then choose Browseon the Media Analysis Solution page.
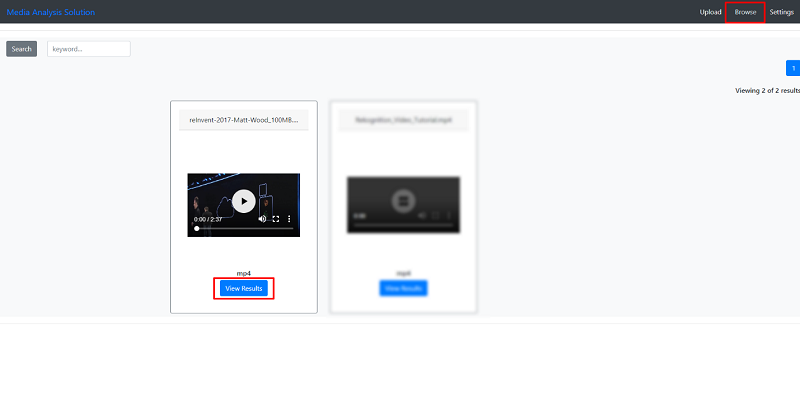
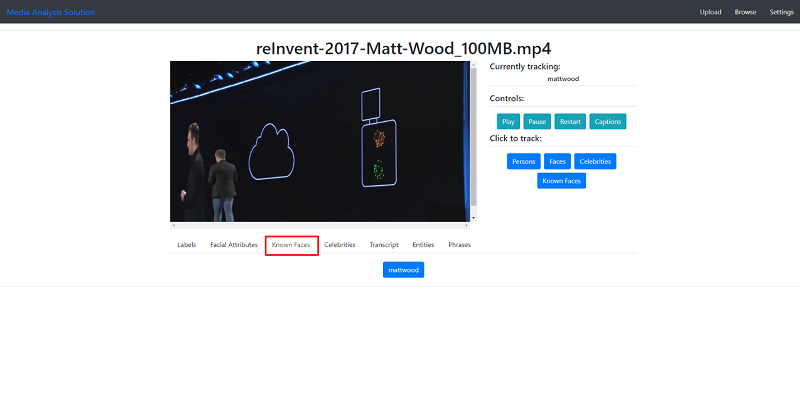
Choose View Results.
As you can see, extracted metadata includes labels, facial attributes, known faces, and celebrities from Amazon Rekognition; a transcript from Amazon Transcribe; and entities and phrases from Amazon Comprehend.
Choose Known Faces and you’ll see that Matt Wood has been recognized since we added him to the Amazon Rekognition collection before we analyzed this video. This feature can be extremely useful for common media use cases that require identification of multiple individuals.
Also, you can choose Entitiesand see that Amazon Comprehend has identified artists from Matt’s presentation, such as Rick Astley and Eric Clapton.

Step 10: Terminate resources
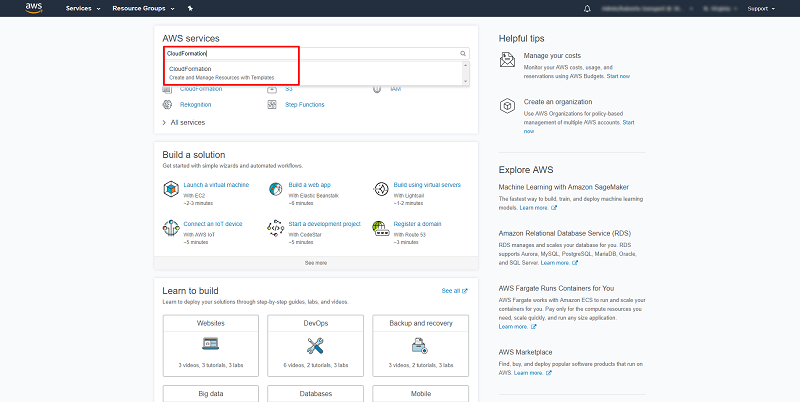
Open the AWS Management Console and type CloudFormation in the search bar and select it.
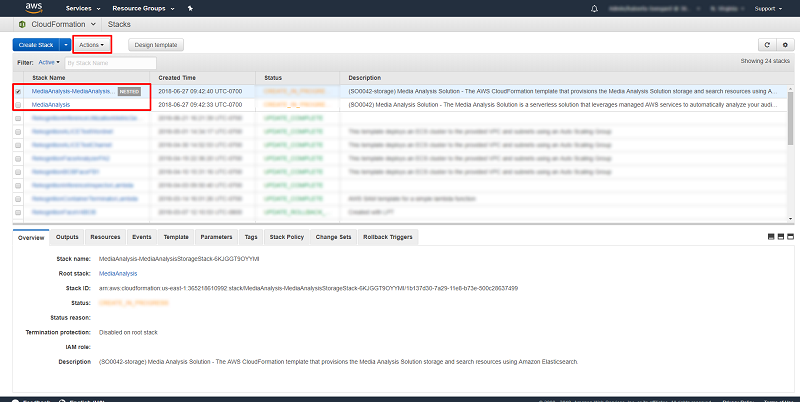
Choose the check box for each stack name that includes “MediaAnalysis” and then choose the Actionsdrop down list and select Delete Stack.Another window will appear; choose Yes, Delete. Ensure that you do this for each Stack Name that includes “MediaAnalysis” to terminate all resources that were part of this tutorial.
Next, open the AWS Management Console and type S3in the search bar and select it. Find any S3 buckets that were created from launching this solution and delete them. First, click on the S3 bucket you want to delete, select Delete bucket, type in the name of the bucket, and then select Confirm.Do this for each of the new S3 buckets created from launching the solution and uploading the test image and video.
Conclusion
Now that you’ve seen how easy it is to extract metadata from your media files, you can use this solution to quickly start building a searchable media library, index and transcribe hours of video footage, and more.
Learn more:
About the Author
 Kaiser Larsen is a Product Marketing Manager for AWS artificial intelligence solutions. Outside of work you’ll find him hiking, cooking for family and friends, and eating ice cream whenever there’s an excuse to celebrate.**