Deep learning is a technique used to solve complex problems such as natural language processing and image recognition. We are now able to solve these computational problems quickly, thanks to a component called the Graphics Processing Unit (GPU). Originally used to generate high-resolution computer images at fast speeds, the GPU’s computational efficiency makes it ideal for executing deep learning algorithms. Analysis which used to take weeks can now be completed in a few days.
While all modern computers have a GPU, not all GPUs can be programmed for deep learning. For those who do not have a deep learning-enabled GPU, this post provides a step-by-step layman’s tutorial on building your own deep learning box. Our deep learning box is essentially another computer equipped with a deep learning-enabled GPU. The GPU is the main difference between a regular computer and a deep learning box.
First, check if your GPU is listed on this site. If it is, it means you already have a GPU capable of deep learning, and you can start from the second section below on software installation. If your computer does not have a suitable GPU, read on to find out about how you can get the required components for less than $1.5k.

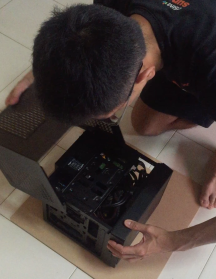
Deep Learning Bot
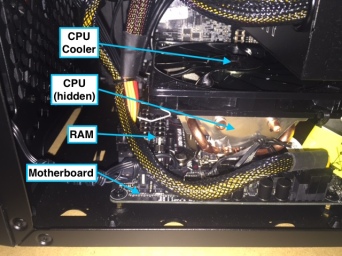
An Inside Peek
This section lists the main components of your deep learning box. If you have no computing knowledge or you want to save time, you may choose to purchase these in-store and pay a nominal fee for assistance to assemble the components. Prices listed below are in USD as of March 2016. The total cost was $1285, which we funded using prize money from competitions.
MotherboardDistributes power to the rest of the components and enables communication between them. It is a printed circuit board.
Central Processing Unit (CPU)Performs general computational operations, like a brain. It is a chip on the motherboard.$410 (bundle) – Asus B150i Pro Gaming ITX (Motherboard) + Intel i5 6600k (CPU)
Random-Access Memory (RAM)Enables quick retrieval of information, like working memory. It is another fixture on the motherboard.$115 – 16GB (2x8GB), Corair Vengeance DDR4 DRAM 2400MHz
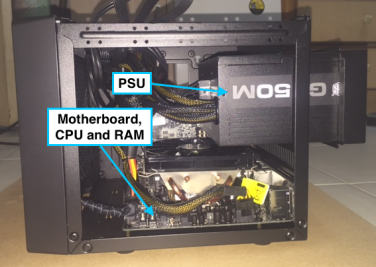
Side View of Machine
Graphics Processing Unit (GPU)Performs intensive computations for deep learning. Our chosen GPU, the GTX 970, has a small form factor so that we could fit it into a portable case. An older GPU, the GTX 770, was able to train a deep learning model with 5120 images on 20 iterations within 33 seconds. Hence, our machine is expected to perform even faster. Nonetheless, you can also get a 1070X or 1080X now as they’ve become more affordable.$415 – 4GB, Gigabyte GTX970 ITX GDDR5
Power Supply Unit (PSU)Converts electricity from the mains to power the machine.$75 – 550W, Cooler Master G550M
Side View of Machine
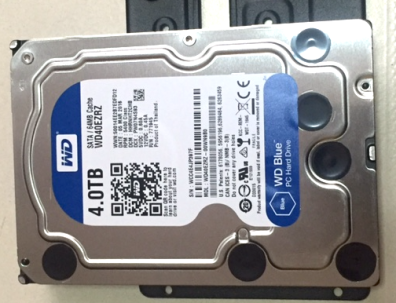
Hard Disk Drive (HDD)Enables lasting storage of information, like long-term memory.$160 – 4TB, Western Digital Blue 5400 RPM
HDD affixed to the internal ceiling plate of the case.
CPU CoolerFans the CPU to prevent it from overheating.$35 – Cooler Master GeminII M4
CaseProtects and holds all the components. Make sure that it has a USB port.$50 – Cooler Master Elite 110
Assembly$25 – in-store service to secure and wire the components.
After the box has been assembled, connect it to a standalone monitor, keyboard and mouse.
Step 1: Install UbuntuUbuntu is the operating system (OS) on which your deep learning box will run, much like Windows or Mac. A straightforward way to install the OS would be to use another computer to download the OS file onto a USB stick. Then, plug the USB stick into your deep learning box and install the OS from there.
Follow the links for instructions on how to download the OS file onto the USB stick from a Windows or Mac. Once you boot Ubuntu on your deep learning box from the USB stick for the first time, you’ll be brought through the installation process.
Step 2: Installing the deep learning stack
 Nvidia is one of the companies that produces GPUs and they have developed a deep learning framework called Digits. Before we can get Digits running, we have to install a few software up the stack.
We need to install a driver, which acts as an access key for the deep learning software to harness the GPU for its computations. To install it, press Ctrl+Alt+T to open the Terminal window.

As of Ubuntu 14.04, the Nvidia drivers are part of the official repository. Even though the version maintained in the repository might not be the newest compared to those on the official Nvidia website, they are usually more stable and have been tested by the community against different software. We would recommend using the drivers from the Ubuntu repository.
To search for the latest driver to install:
You should be able to find a package that looks like “nvidia-xxx” where xxx is the version number of the driver. Choose the latest one. In this example we would be using nvidia-352.
Then, type in the following commands:
The additional packages “nvidia-modprobe” and “nvidia-settings” allow easier installations of future packages to Ubuntu.
Step 3: Install CUDA and Digits
CUDA is a platform that enables the GPU to execute tasks in parallel, increasing its efficiency. Digits is the interface for deep learning analysis. You use this interface to upload data, train models and make predictions. To install them, run the following commands:
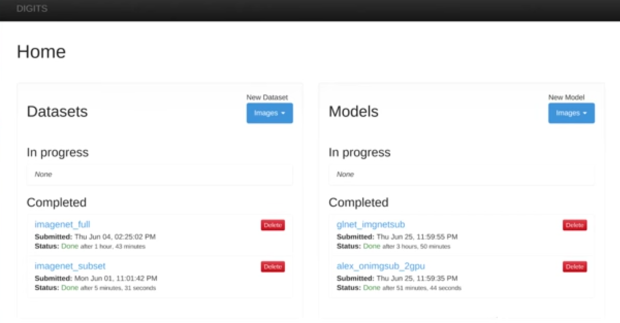
When the installation is successful, fire up your browser and go to http://localhost. You should see a webpage like the one below:
If you run into errors, refer to the troubleshooting section in the official installation guide.
Nvidia Digits is a user-friendly platform that allows you to train prediction models using deep learning techniques. The video below provides a comprehensive demo on the entire process, from uploading data to making predictions:
That’s it. You have just built your own deep learning box. If you’re new to deep learning, you can also test the techniques in the cloud first, using Google’s Cloud Machine Learning platform. However, using your own GPU to run analysis might allow you more speed and flexibility to tweak parameters in the long-run.
Did you learn something useful today? We would be glad to inform you when we have new tutorials, so that your learning continues!
Sign up below to get bite-sized tutorials delivered to your inbox:
![]()
Copyright © 2015-Present Algobeans.com. All rights reserved. Be a cool bean.
Like this:
Like Loading…
Related